Subscribe has the capability to integrate forms with different CRM's. To integrate a form with Konnektive, follow the steps
Integrating the Form
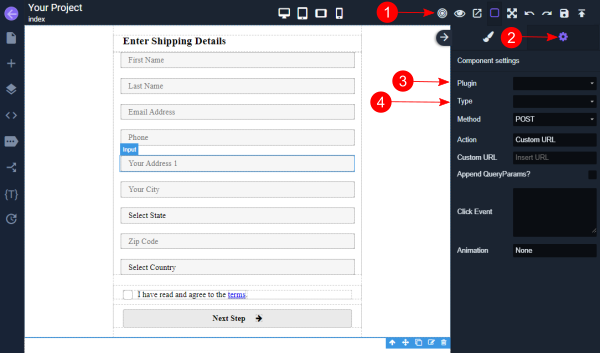
1. On Index page, locate your form using the "Locate Form" button.
2. Navigate to the gear icon to open the form settings sidebar.
3. Select your plugin. In this case, select Konnektive Plugin. Ensure you have the plugin activated in your account before integrating any form.
4. Select the form "Type" In most cases, when there is no payment information in the form, the Type is set to "Lead Form".
Note: When selecting the Type, Subscribe will add appropriate attributes and reset view, you might need to click Locate Form button once more. Ensure the "Method" is set to "POST"
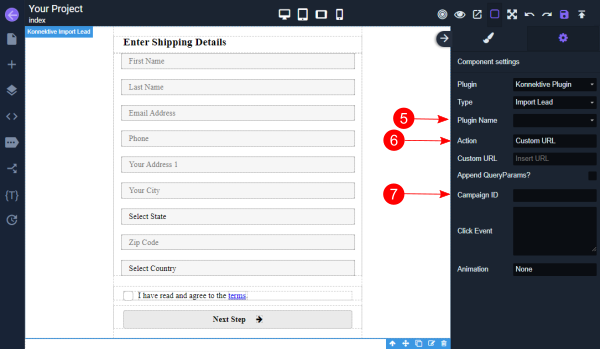
5. Set Plugin Name to: "My Konnektive Plugin"
6. Select the page you would like to route to from the ‘Route’ dropdown menu.
7. In the ‘Campaign ID’ field, input the CID of the corresponding campaign. This will ensure all sales are tracked and passed accurately.
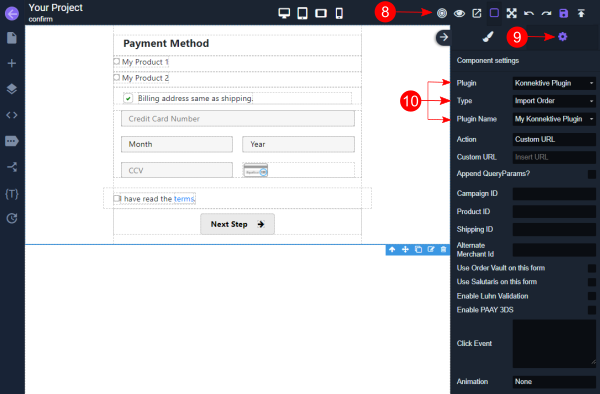
8. Navigate to the following page in the flow and select the form by clicking on "Locate Form" button.
9. Open the form settings by clicking on the gear icon.
10. Select the same plugin and plugin name as the index page, but switch the type to ‘Import Order’ so that payment information is passed properly.
Integrating Products
• If there are multiple purchase options:
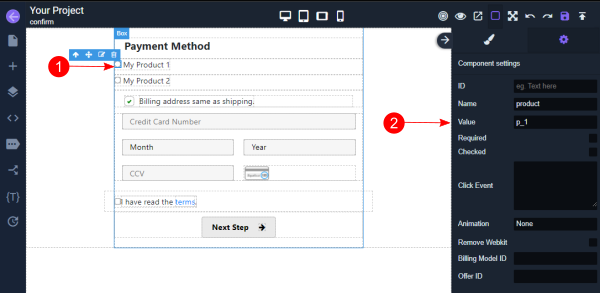
1. The Product ID must be input into the field within the radio button settings. Begin by selecting the first radio button.
2. Navigate to the gear icon and insert the Product ID into the ‘Value’ field. All other fields can remain blank. The ‘Name’ field may be pre-populated with the word ‘product’, which should remain in place.
• If there is a single product:
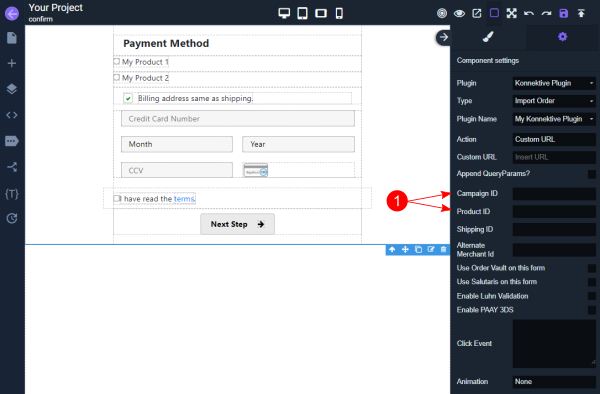
1. Input both the Campaign ID and the Product ID.
